

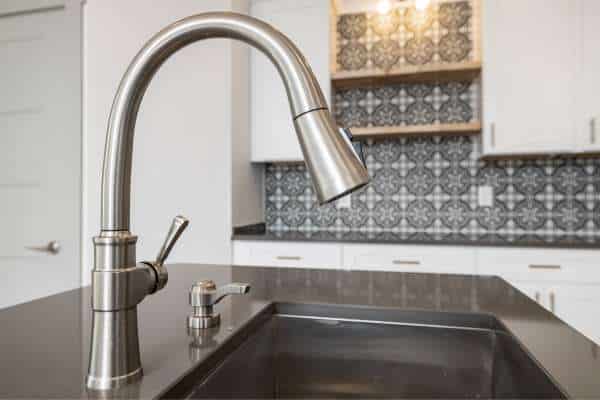
Replacing A kitchen sink faucet might seem Intimidating, But it’s A task many homeowners can tackle with The right guidance. Whether your old faucet Is Leaking, Outdated, Or simply not functioning as It Should, Installing A new one can breathe new life into your kitchen without The need for professional help. This guide will walk you through each step of The Process, Ensuring you have all The Tools, Knowledge, How To Replace A Kitchen Sink Faucet And confidence To replace your kitchen tube successfully. From turning off The water supply To securing The new Fixture, You’ll learn how To complete this DIY project with ease. By The End, You’ll have A refreshed kitchen setup that’s both functional And Stylish, Without The hassle of calling In A plumber. Let’s dive into how you can replace your kitchen sink tube with minimal effort And maximum results.
Tools and Materials You Will Need
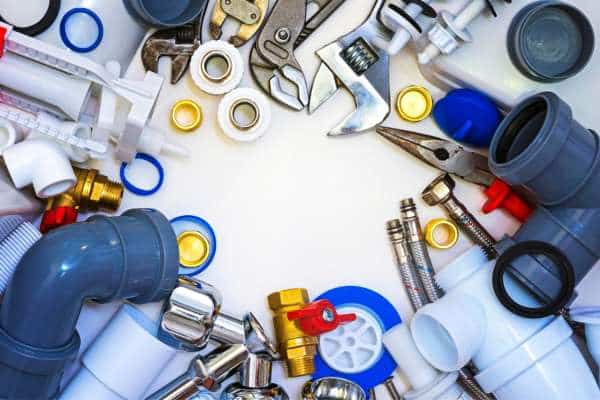
Before diving into The process of replacing your kitchen sink Faucet, It’s essential To gather all The necessary tools And materials. Having The right equipment on hand will save time And ensure A smooth installation. You’ll need basic tools like an adjustable Wrench, A basin Wrench, And A screwdriver For loosening And tightening The various connections. In Addition, Plumber’s tape is A must-have To secure A leak-free seal on The water supply lines. You’ll also need A bucket or towel To catch any residual water when disconnecting The old tube. As for Materials, Make sure you have The new tube Ready, Along with any additional parts like supply lines if they aren’t included in The tube kit.
Turn Off the Water Supply
Turning off The water supply Is The crucial first step In replacing your kitchen sink faucet. Failing To do so can result in A messy Situation, With water spilling Everywhere, Causing unnecessary damage. To Begin, Locate The water shut-off Valves, Typically found under The sink. There will be two valves—one for hot water And one for cold. Turn each valve clockwise To stop The flow of water To The tube. If your sink doesn’t have individual shut-off Valves, You may need To turn off The main water supply To your house. After shutting off The Valves, Turn on The faucet To release any remaining water In The Lines, Ensuring The system Is fully drained. This step not only prevents potential flooding but also makes The rest of The installation process easier And safer. By following this simple Procedure, You’ll set The stage for A smooth And hassle-free faucet replacement.
Disconnect the Existing Faucet
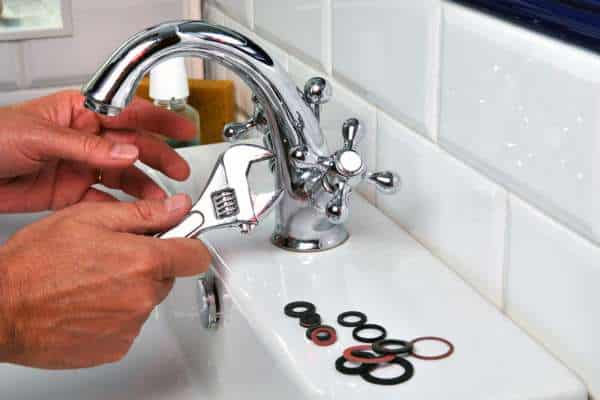
Before installing your new kitchen Faucet, The next step Is To disconnect The existing one. Start by ensuring The water supply Is turned Off, Then grab your tools To get started. Use an adjustable wrench or A basin wrench To loosen The nuts that connect The water supply lines To The faucet. Be prepared for A small amount of water To escape from The Lines, So keep A bucket or towel nearby To catch any drips. These can be tricky To Reach, But with patience And The right Tools, You can unscrew them. This step clears The way for The new faucet Installation, Giving you A fresh start for your updated kitchen fixture.
Clean the Sink Area

After disconnecting The old Faucet, It’s essential To clean kitchen faucent head area thoroughly before installing The new one. Over Time, Dirt, Grime, And old sealant can build up around The base of The Faucet, Which can prevent A proper seal for your new fixture. Start by wiping away any loose debris or water with A clean cloth. If there’s an old plumber’s putty or Caulking, Carefully scrape it off using A plastic scraper To avoid scratching The surface of The sink. You can also use A mild cleaning solution To remove any stubborn grime or mineral deposits that have accumulated. Cleaning The area not only ensures A secure fit for The new faucet but also prevents leaks or water damage over time.
Positioning the New Faucet

Now that your sink area Is clean And Prepped, It’s time To position The new faucet. Start by placing The tube through The mounting holes on your sink or countertop. Ensure that it’s aligned Correctly, As improper positioning can lead To leaks or uneven water flow. If youtube doesn’t have One, Plumber’s putty can be used as an alternative. Once The tube Is in Place, Check that it Is sitting level. This is crucial for both aesthetic And functional purposes. Use The provided washers And mounting nuts underneath The sink To secure The faucet tightly. Be sure To avoid Overtightening, As it can cause damage to The sink or tube components. Proper positioning Is key To A Smooth, Leak-free faucet installation.
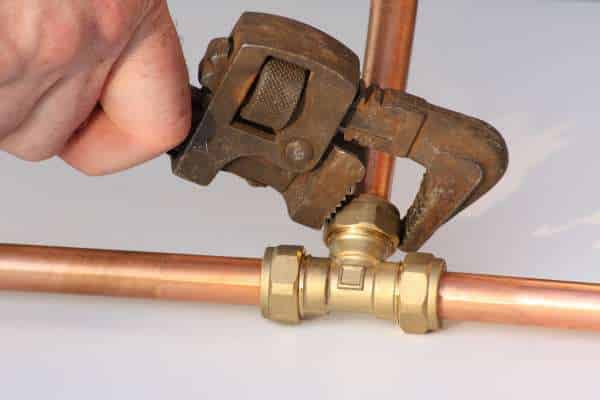
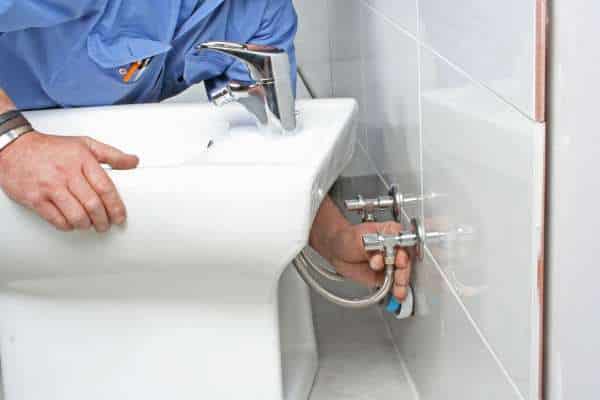
Connecting the Water Supply Lines
With The new faucet securely In Place, The next step is To connect The water supply lines. This is A crucial part of The installation Process, As improper connections can lead To leaks And water damage. Begin by identifying The hot And cold water supply Lines, Usually marked or color-coded. Attach these lines To The corresponding inlet valves on The faucet. Use an adjustable wrench To tighten The Connections, But be cautious not to Overtighten, As this could damage The fittings or cause leaks. If your new tube didn’t come with supply Lines, You may need To purchase flexible supply hoses that fit your plumbing setup. It’s also A good idea to apply plumber’s tape to The threaded ends of The connections To ensure A watertight seal. Properly connecting The supply lines Is essential for A Successful, Leak-free installation.
Tightening the Connections
Once The water supply lines are Connected, It’s time To tighten all The connections To ensure A Secure, leak-free setup. Begin by checking each connection Point, Both at The base of The faucet And where The water supply lines meet The shut-off valves. Using an adjustable Wrench, Tighten each fitting carefully. Be mindful not To Overtighten, As excessive force can damage The threads or even crack components like plastic or metal Nuts, Leading To leaks later on. A snug fit is key—tight enough To create A watertight Seal, But not so tight that it stresses The connections. After Tightening, Visually inspect each connection To ensure everything looks Correct, And check that The tube remains properly aligned.
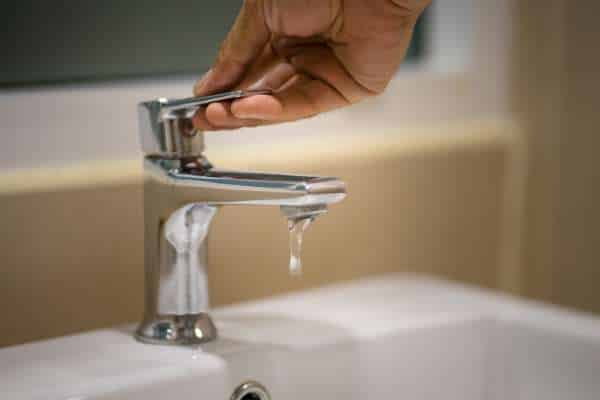
Testing the New Faucet Installation
After all connections are Tightened, It’s time To test your new faucet installation. Begin by slowly turning on The water supply at The shut-off valves. This gradual process helps to prevent A sudden rush of Water, Which can cause unexpected leaks or pressure issues. Once The water is Flowing, Turn on The tube To check both The hot And cold water settings. Look closely at all The connection Points, Especially under The Sink, For any signs of leaks or dripping. Let The water run For A few minutes To ensure everything Is functioning properly. Testing your installation is A crucial step To verify that your new faucet Is operating smoothly And without any issues before considering The job complete.
Sealing Around the Faucet Base
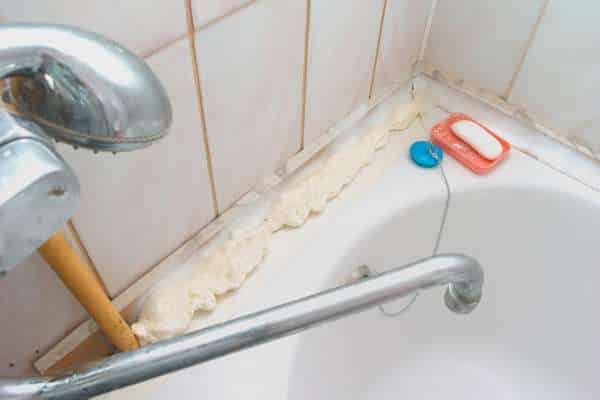
This is especially important for protecting your countertop And under-sink cabinet from potential water damage over time. Many faucets come with A rubber gasket or sealing ring To create A watertight barrier. If not, you can use silicone caulk or plumber’s putty To fill The gap between The tube base And The sink. Apply A Thin, Even layer of sealant around The Base, And use A damp cloth To smooth out any excess. Allow The sealant To cure as per The product instructions before using The faucet extensively. This sealing step ensures your tube remains secure And leak-Free, Adding durability To your installation while keeping your kitchen looking clean And polished.
Troubleshooting Common Installation Issues
Even with careful Installation, You may encounter some common issues when replacing A kitchen faucet. Troubleshooting these problems early ensures that your new tube operates smoothly. One frequent issue Is leaks At The connection Points, Often caused by loose fittings or insufficient plumber’s tape. Tighten The connections gently And reapply tape if needed. Another issue could be low water Pressure, Which is typically A result of clogged aerators or supply lines. Removing And cleaning The aerator or checking for blockages in The supply lines should resolve this. In some Cases, Improper alignment of The tube can cause unsteady water flow or Leaks, So double-check that The faucet Is level And securely mounted. Addressing these common problems early on will save you time And Frustration, Ensuring your faucet works perfectly In The long run.
Final Touches and Clean-Up
With The faucet installation Complete, It’s time for The final touches And clean-up To ensure everything looks And works perfectly. Start by wiping down The tube And sink area To remove any Dust, Fingerprints, Or excess sealant from The installation process. If you use plumber’s putty or silicone Sealant, Ensure it has dried completely before using The tube regularly. Don’t forget To clean The workspace under The sink by removing tools And disposing of any old materials or debris. These final touches not only leave your kitchen looking neat and polished but also ensure that The faucet Is installed Securely, Giving you peace of mind that everything Is in top condition For long-term use.
How long does it take to replace a kitchen sink faucet?
Replacing A kitchen sink faucet typically takes around 1 To 2 Hours, Depending on your skill level And The complexity of The project. However, If you’re A beginner or encounter issues like hard-To-reach Fittings, Corroded Parts, Or older Plumbing, It may take longer. Additionally, Gathering all necessary tools And materials in advance can help streamline The process. With careful preparation And following A step-by-step Guide, This project can be completed relatively Quickly, Making it A manageable DIY task For most homeowners.
Can I replace a kitchen sink faucet by myself?
Yes, Replacing A kitchen sink faucet Is A DIY-friendly task that most homeowners can tackle with The right tools And guidance. While it may seem intimidating at First, The process Is fairly straightforward if you follow A step-by-step approach. Basic tools like an adjustable Wrench, Plumber’s Tape, And A screwdriver are typically all you need. However, Before you Begin, It’s essential To ensure that you can access The space under The sink comfortably And that you have The right type of replacement tube for your setup. By turning off The water Supply, Disconnecting The old Faucet, And carefully installing The new One, You can complete The job in A few hours. If you’re patient And Methodical, Replacing A tube yourself can save time And the expense of hiring A plumber.
Conclusion
Replacing A kitchen sink faucet is A manageable DIY project that can refresh The look And functionality of your kitchen without The need For professional help. By following A clear step-by-step process—beginning with turning off The water Supply, Disconnecting The old Faucet, And carefully installing The new one—you can complete The task efficiently. Ensuring you have The right Tools, Properly tightening Connections, And testing for leaks are key To A successful installation. With some preparation And attention To Detail, You can avoid common issues And enjoy A New, Fully functional tube. Not only will this improve your kitchen’s Appearance, But it will also provide you with A sense of Accomplishment, Knowing you handled The project on your own.