
Removing a kitchen faucet nut may seem like A daunting task, especially if you’re new to plumbing repairs, But it’s simpler than you might think. Whether you’re replacing an old tube Or fixing a leak, getting that stubborn bolt off is The first crucial step. Over time, how to remove kitchen faucet nut Faucet nuts can become tight, rusted, or corroded, Making removal tricky without the right tools And techniques. In this guide, We’ll walk you through the process of removing a kitchen faucet nut safely And efficiently. From gathering the right tools To tackling stuck or rusted nuts, you’ll learn the best methods To handle the job like a pro. With the right approach, You’ll have that faucet bolt off in no time and be well on your way To completing your kitchen repair Or upgrade.
Tools You Will Need
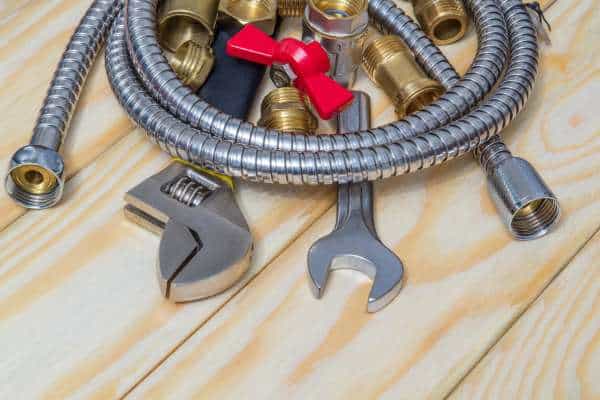
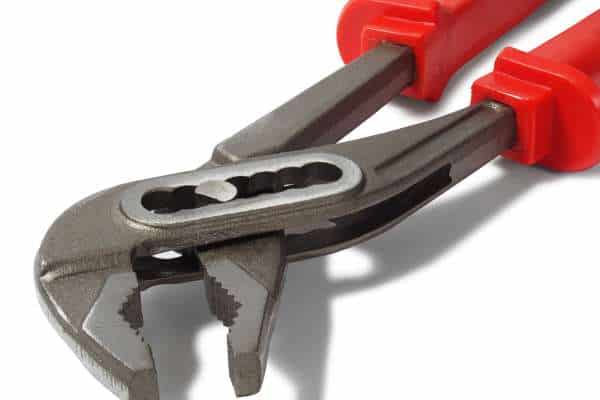
Removing a kitchen faucet nut, Having the right tools will make the job much easier and efficient. First, A basin wrench is the most essential tool, As it is specifically designed to reach and loosen faucet bolts in tight spaces beneath sinks. If you don’t have a basin wrench, An adjustable wrench or locking pliers can work, Though they may be harder to maneuver in confined areas. For nuts that Are rusted or stuck due to corrosion, Penetrating oil like WD-40 is helpful to loosen them up. A flashlight Or headlamp is crucial for visibility, as the space under The sink is often poorly lit. Additionally, Having a bucket or towel handy will help catch any excess water that may spill during The process.
Turn Off the Water Supply
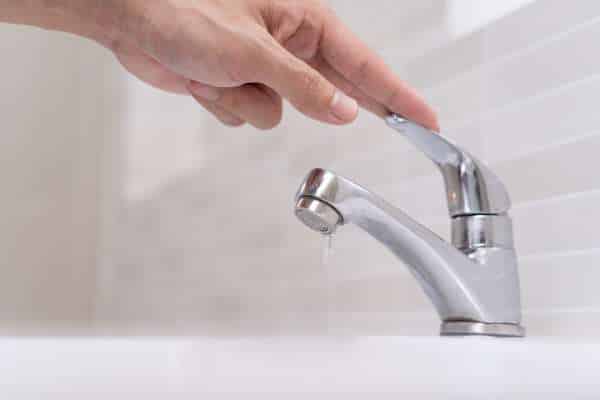
Before attempting to remove the kitchen faucet nut,It’s crucial to turn off the water supply to avoid any potential leaks Or flooding. This step ensures that water won’t flow through The pipes while you work on removing The tube. To do this, Locate the shut-off valves beneath your sink, Typically found on the hot and cold water lines. Turn both valves clockwise until they Are fully closed. If your sink doesn’t have dedicated shut-off valves, you may need to turn off The main water supply for The entire house. After shutting off the water, Test the tube by turning it on to drain any remaining water from The lines. This step not only prevents mess but also ensures a safe And smooth removal process without any unexpected water flow.
Clear the Area Under the Sink
Before you begin the process of removing the kitchen faucet nut, It’s important to clear the area under the sink For easy access and A more comfortable workspace. Start by removing any cleaning supplies, garbage bins, Or storage items that may be in The way. Having a clear area will give you the room you need To maneuver tools, as well as prevent any damage to your belongings during The removal process. It’s also a good idea to lay down A towel or place A bucket underneath to catch any water that may leak when disconnecting The tube. Creating an organized And open workspace not only makes it easier To work on the faucet but also helps reduce stress, Ensuring the job can be done quickly And efficiently without interruptions.
Inspect the Faucet Nut Location
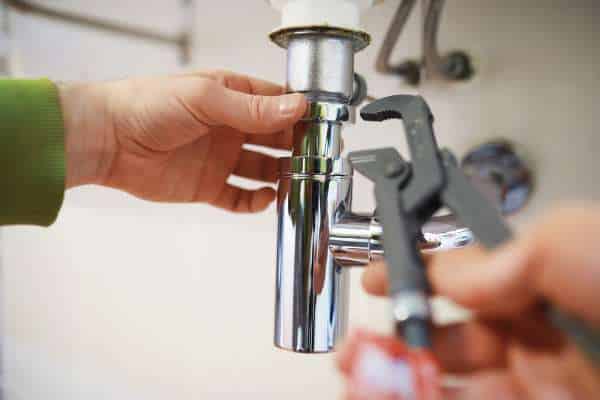
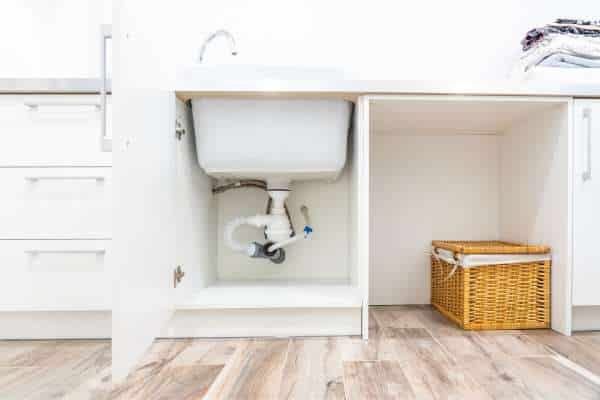
Before attempting to remove the kitchen faucet nut, It’s essential to inspect its location to understand how best To access it. The tube bolt is typically found underneath the Sink, Securing the tube to the countertop or sink. Depending on the design of your sink And faucet, this area may be hard to reach, Especially in tight spaces. Use a flashlight to get A clear view of the nut and surrounding components, And take note of any obstructions like pipes or hoses that may limit access. In some cases, You may need to move these parts slightly for better clearance. This inspection will also help you determine whether you’ll need A basin wrench Or other tools to get the job done. Being aware of The nut’s exact location will save you time and ensure A smoother removal process.
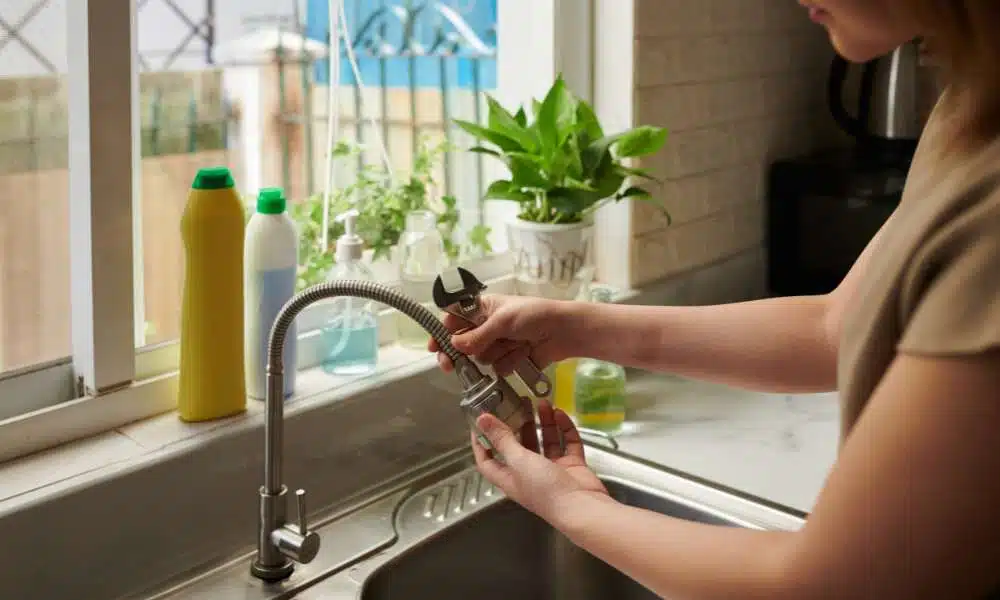
Use a Basin Wrench for Tight Spaces

A basin wrench is an essential tool when dealing with tight spaces under the Sink, Especially for removing or loosening hard-To-reach faucet nuts. To use a basin wrench, Position the jaw around the tube nut, Ensuring it grips securely. Then, Turn the wrench counterclockwise to loosen the bolt. The long handle provides the necessary leverage, Allowing you to apply sufficient force without much effort. This makes it easier To tackle stubborn or rusted bolts that Are difficult to remove. The basin wrench’s unique design helps You access Nuts located behind Or underneath the Sink, Where traditional tools may Struggle, Making it an indispensable tool for plumbing tasks In tight spaces.
Apply Penetrating Oil for Stuck Nuts
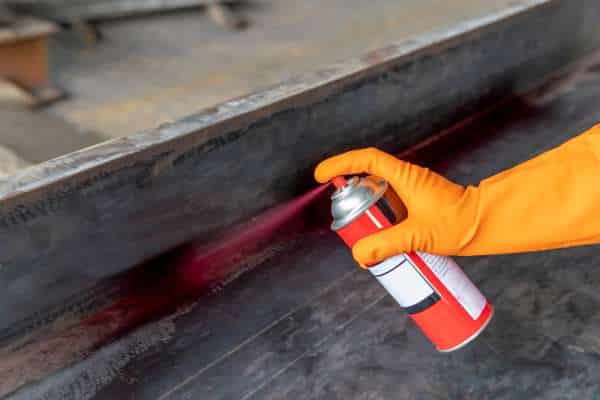
Dealing with a stuck kitchen faucet nut, Applying penetrating oil can be an effective solution. Over time, Faucet nuts can become corroded or rusted, Making them difficult to remove with standard tools. To use, simply spray The oil generously onto the nut, ensuring full coverage around The threads. Let the oil sit for 10-15 minutes To allow it to penetrate and loosen the bond. Afterward, use A wrench or basin wrench to try loosening The bolt again. The oil significantly reduces friction, Making the stuck nut easier to remove without applying excessive force, Preventing damage to your tube And hardware.
Use Pliers or an Adjustable Wrench
Using pliers or an adjustable wrench is A straightforward way to remove a kitchen faucet nut, Especially when the nut is not in A particularly tight or hard-to-reach space. Pliers, Such as channel locks or locking pliers, Provide a firm grip, allowing you To apply pressure evenly to turn the bolt. An adjustable wrench is ideal for bolts of various sizes, As you can adjust The jaw width for a snug fit. To use either tool, Position it securely around the nut and turn counterclockwise to loosen. Make sure you grip The bolt tightly to avoid stripping Or damaging it.
Remove the Nut by Turning Counterclockwise

To successfully remove a kitchen faucet nut, The key is to turn it counterclockwise. After ensuring you have The correct tool, Such as a basin wrench, Pliers, or an adjustable wrench, Grip the bolt securely and begin turning it counterclockwise. Be patient, As the bolt may initially resist due to tightness, rust, Or mineral buildup. If it feels Stuck, apply steady pressure without forcing it too hard To avoid damaging the surrounding components. If necessary, You can use penetrating oil to help loosen A stubborn nut. Once the bolt begins to turn, Continue until it is fully unscrewed. This simple But essential step will allow you To proceed with replacing Or repairing your kitchen tube efficiently.
Tighten a Loose single Handle Kitchen Faucet Base

Tightening a loose single-handle kitchen faucet base is A simple task that can prevent further issues like water leaks Or damage to the surrounding area. To begin, Locate the mounting nuts beneath the sink, Which secure the faucet base to The countertop. You may need a basin wrench to reach these bolts In tight spaces. Once you’ve located The nuts, Tighten them by turning them clockwise To secure the base. Be careful not to overtighten, As this could crack The sink or the tube base. If the tube continues To wobble after tightening, check for any additional screws Or components that may need adjustment. A secure base will keep The faucet functioning smoothly And prevent unnecessary Wear, Ensuring the stability and longevity of your kitchen tube.
How to Handle Difficult Nuts
Dealing with difficult or stuck nuts when removing A kitchen faucet can be frustrating, but there are a few methods To help loosen them. Start by applying penetrating oil, Such as WD-40, Which can help break down rust or corrosion. Let the oil sit for 10-15 minutes to allow it To penetrate the threads. In extreme cases, applying heat To the nut using A hairdryer can expand the metal, Making it easier to loosen. Always be cautious when applying force, As excessive pressure can damage The surrounding fixtures or pipes. By using these techniques, You can effectively handle even The most difficult faucet bolts without causing damage.
Double-Check for Leaks After Removal

After successfully removing a kitchen faucet nut And completing any necessary repairs or replacements, It’s important to double-check for leaks to ensure everything Is secure. Start by turning the water supply back on Gradually, Allowing water to flow through the tube. While the water is running, Inspect the area where the tube was reinstalled, paying close attention to The connections underneath the sink. Look for any signs of dripping Or pooling water around The tube base or supply lines. If you notice any leaks, Tighten the connections or reapply plumber’s tape to create a better seal. Catching A leak early can prevent potential water damage to your sink, cabinets, Or flooring.
What should I do if the kitchen faucet nut is rusted or stuck?
There are several steps you can take To loosen it. First, apply penetrating oil like WD-40 to the bolt. This will help break down any rust Or debris that is causing it to stick. Let the oil sit For about 10-15 minutes To work its way into the threads. Once the oil has penetrated, Use a basin wrench or locking pliers To grip the bolt And turn it counterclockwise. If the bolt still won’t budge, You can apply heat using a hairdryer to expand the metal, Which may help loosen it. Be careful when applying pressure to avoid damaging The surrounding parts. With the right tools and A bit of patience, you should be able to free the rusted Or stuck nut.
Conclusion
Removing a kitchen faucet nut doesn’t have to be A frustrating or time-consuming task when you have the right tools And follow the correct steps. By turning off the water supply, Using the appropriate wrench, And applying methods like penetrating oil or heat for stubborn, Rusted nuts, you can complete this task with ease. Patience is key, Especially when dealing with old Or corroded hardware. Whether you’re doing this for The first time or as part of A routine upgrade, removing the tube bolt is an important skill that can save you both time and money. With these tips, you’ll be able To tackle future kitchen faucet issues like A seasoned DIY expert.