
Removing The aerator from your kitchen faucet Is A simple maintenance task that can dramatically improve water flow And overall faucet performance. Over Time, Mineral buildup And debris can clog The Aerator, Leading To low water pressure or uneven water distribution. Whether you’re dealing with reduced flow or just performing regular Maintenance, How To Remove Aerator From Kitchen Faucet Knowing how To remove And clean The ventilator Is essential. This guide will walk you through The process step-by-Step, From identifying The type of ventilator on your tube To safely removing it using The right tools. You’ll also learn how To clean or replace The Aerator, Ensuring your faucet functions at its best. By following these simple Instructions, You can easily maintain your kitchen tube And extend its lifespan without The need For professional assistance.
You Might Need to Remove the Aerator

There are several reasons why you might need To remove The aerator from your kitchen faucet. Over Time, Mineral Deposits, Debris, And Sediment Can accumulate In The Aerator, Leading To reduced water pressure or an uneven water flow. If you notice that your faucet’s stream Is weak or spraying In multiple Directions, It’s likely A sign of A clogged ventilator. Additionally, Removing The ventilator Is necessary when you need to clean or replace It, Especially if you live In an area with hard Water, Which accelerates mineral buildup. Regular maintenance of The ventilator ensures optimal water Flow, Better Filtration, And can extend The life of your tube. In some Cases, You may also need To remove The ventilator To install water-saving devices or make repairs To The tube itself.
Tools You’ll Need to Remove a Faucet Aerator
Removing A faucet aerator can be A simple task if you have The right tools on hand. For many standard Aerators, You may be able To unscrew it by hand. However, If the ventilator Is stuck or difficult To Remove, You’ll need A few essential tools. An adjustable wrench or pliers can help loosen A stubborn Aerator, But To protect your tube from Scratches, It’s A good idea To wrap the tool with A cloth or rubber band. For recessed ventilators, A specialized ventilator removal kitchen faucet tool may be necessary To access And remove It properly. Additionally, You might want To have plumber’s tape ready To ensure A secure fit when reinstalling The ventilator. Having these tools prepared will make The removal process smoother And prevent any damage To your faucet.
Identifying the Type of Aerator on Your Faucet
Before attempting To remove your kitchen faucet Aerator, It’s important To identify The type of ventilator you have. There are generally two types: standard And recessed ventilators. Standard ventilators are easily visible at The end of The tube spout And can typically be unscrewed by hand or with A simple tool. Recessed Aerators, On The other Hand, Are hidden within The tube Spout, Making them A bit more difficult To access. These usually require A special ventilator key or removal tool designed To fit inside The faucet. Knowing which type of ventilator you’re dealing with will help you choose The correct tools And approach for removal. Identifying The ventilator type In advance ensures A smoother process And prevents damage To your Faucet, Saving you time And effort In The long run.
Preparing to Remove the Aerator
Before removing The aerator from your kitchen Faucet, It’s important To prepare properly To ensure A smooth And safe process. Start by cleaning The area around The faucet To avoid debris falling into The water lines once The aerator is removed. In most Cases, You won’t need To turn off The water Supply, But it’s A good idea To ensure The tube is off. Gather The necessary Tools, Such as pliers or an ventilator removal Tool, Depending on The type of ventilator you have. If you’re concerned about scratching The Faucet, Wrap The tool with A soft cloth. Having A small container or towel nearby To catch any loose debris is also helpful. Proper preparation ensures you can remove The ventilator without causing Damage, Making The task easier And more efficient.
Removing a Standard Faucet Aerator by Hand
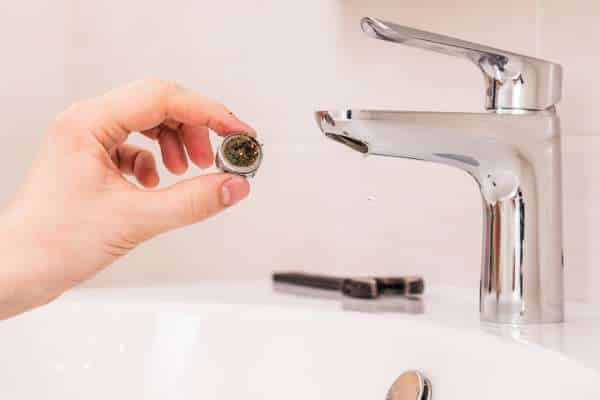
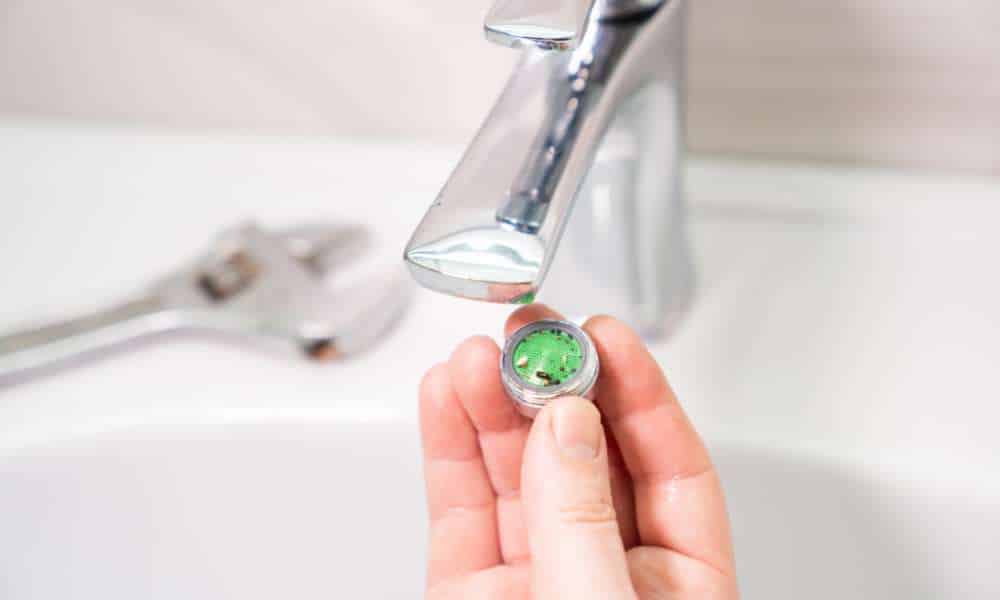
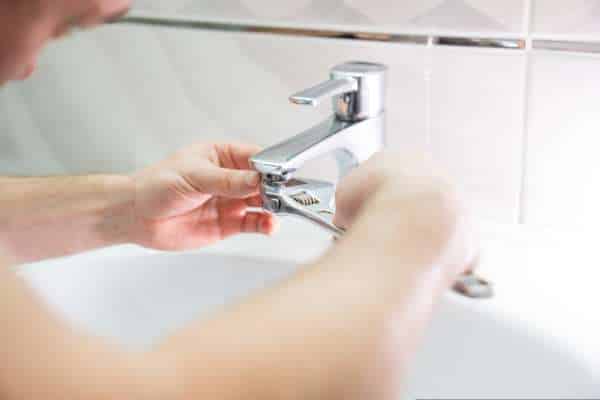
Removing A standard faucet aerator by hand Is usually A straightforward task. Begin by checking if The ventilator Is visible at The end of The tube spout. In most Cases, You can simply grip The aerator And twist It counterclockwise to unscrew it. Make sure To have A good Grip, As The ventilator might be tightly secured due To mineral buildup or frequent use. If it’s too Tight, You can use A rubber glove or A small cloth To help get A better hold without damaging The tube. Once The ventilator is Loosened, Carefully remove it And inspect it for any debris or blockages. Removing The aerator by hand Is A quick And easy way To maintain your faucet’s Performance, Ensuring smooth water flow And preventing potential issues.
Using Tools to Remove a Stuck Aerator

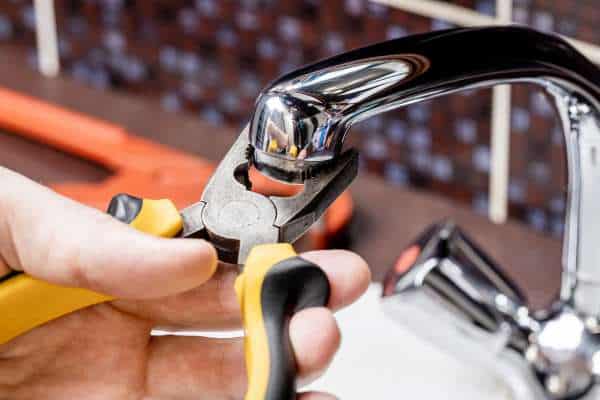
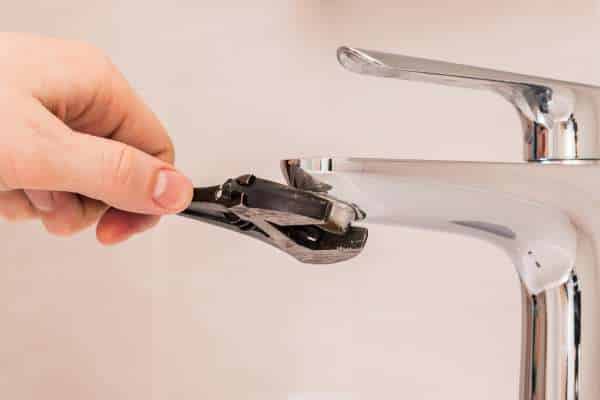
An aerator Is stuck And can’t be removed by Hand, Using The right tools becomes essential. Start by grabbing an adjustable wrench or A pair of pliers To gently grip The aerator. To prevent damaging The faucet’s Finish, Wrap The aerator or tool with A cloth or rubber band For protection. Carefully twist The ventilator counterclockwise To loosen it. If The ventilator remains Stuck, Applying A small amount of penetrating oil around The threads can help loosen The buildup. Give it A few minutes To Work, Then try again with The tool. Take care not To apply too much Force, As this could damage The faucet or The ventilator itself. Once The ventilator is Removed, You can clean or replace It, Restoring smooth water flow And functionality.
Removing a Recessed Faucet Aerator
Removing A recessed faucet aerator can be A bit more challenging than A standard One, As it is hidden inside The tube spout. To Begin, You’ll need A special ventilator removal tool or key designed specifically For recessed ventilators. These tools fit into The slots or grooves inside The Faucet, Allowing you To unscrew The ventilator. Insert The tool carefully into The Spout, Ensuring it Is properly aligned with The ventilator’s notches. Gently twist counterclockwise To loosen And remove The ventilator. If it’s stuck due To mineral Buildup, Applying A bit of vinegar To The area can help dissolve The blockage. Once The aerator Is Removed, Clean or replace it As needed. Removing A recessed aerator with The proper tool ensures A smooth process without damaging your faucet.
Cleaning the Aerator Once It’s Removed
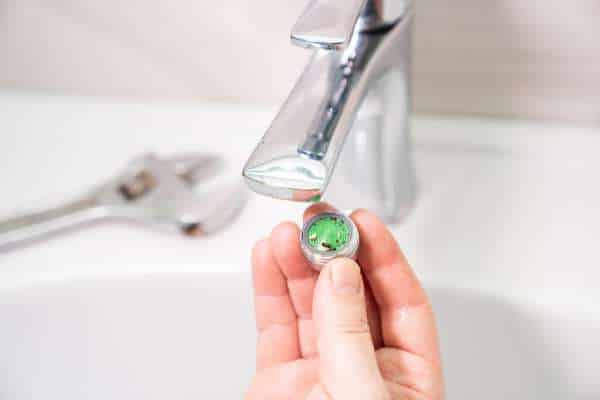
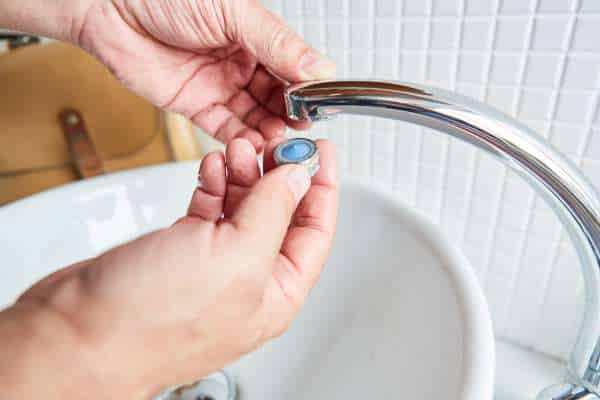
After removing The aerator from your kitchen Faucet, The next step is To clean it thoroughly To restore proper water flow. Over Time, Mineral Deposits, debris, And small particles can accumulate inside The Aerator, Leading To reduced water pressure or an uneven spray. Start by disassembling The Aerator, Carefully removing The screen And other parts. Soak these components In A bowl of white vinegar for about 15-30 minutes To dissolve any mineral buildup. If The debris is Stubborn, Use A soft brush or toothpick To gently scrub The screen And openings. Once Cleaned, Rinse all parts under running water To remove any remaining residue. Reassemble The ventilator And reinstall it onto The tube. Cleaning The ventilator ensures optimal water flow And helps maintain The longevity And efficiency of your kitchen faucet.
Inspecting the Aerator for Damage

Once you’ve removed And cleaned The Aerator, It’s important To inspect it for any signs of damage before reinstalling it. Over Time, The small components of a ventilator—like The mesh Screen, Rubber Washers, And casing—can wear Out, Leading To poor water flow or leaks. Start by examining The mesh screen for any tears or blockages that can’t be cleaned out. Check The rubber washers for cracks Or signs of Deterioration, As they help create A watertight seal. If any part looks worn out or Damaged, It’s best To replace The ventilator entirely. A damaged aerator can reduce water pressure And even cause leaks over time.
Reinstalling the Cleaned or New Aerator
After cleaning or replacing The Aerator, It’s time To reinstall it on your kitchen faucet. Begin by ensuring all Parts, Including The Screen, Washers, And Casing, Are properly assembled. Gently screw The ventilator back onto The tube spout by Hand, Turning it clockwise. Be sure To align The threads carefully To avoid cross-Threading, Which can cause damage or leaks. A snug fit is sufficient To prevent leaks while allowing for easy removal in The future. After Reinstallation, Turn on The tube And check for proper water flow. Reinstalling The cleaned or new aerator ensures your faucet runs smoothly And Efficiently, Improving both water pressure And performance.
Testing the Water Flow After Reinstallation

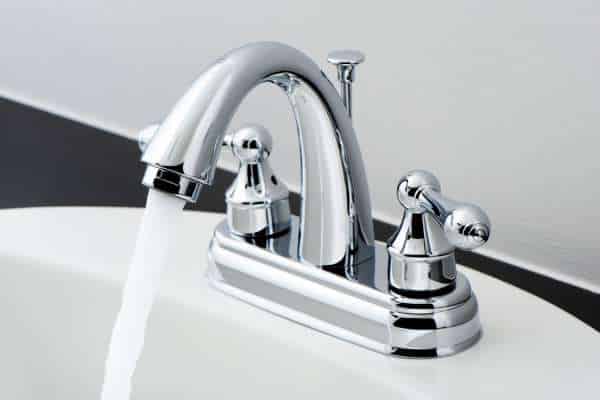
Once The aerator is Reinstalled, It’s important To test The water flow To ensure everything Is functioning correctly. Start by slowly turning on The faucet To check for any leaks around The ventilator. Observe The water flow To ensure it’s smooth And Even, With no irregular spray patterns or weak pressure. If everything is working well, run both hot and cold water to ensure the flow remains steady under different temperatures. Testing The water flow after reinstalling The aerator helps confirm that The cleaning or replacement was Successful, Ensuring optimal water pressure And A properly functioning tube For everyday use.
How often should I clean or replace my faucet aerator?
Cleaning or replacing your tube ventilator every 6 To 12 months is generally recommended To maintain optimal water flow And prevent buildup. In areas with hard Water, Mineral deposits can accumulate more Quickly, So more frequent cleaning may be necessary. Regular maintenance helps remove Debris, Sediment, And other particles that can clog The aerator And reduce water pressure over time. If you notice A decrease in water flow or uneven spray Patterns, It’s A sign The ventilator may need immediate cleaning or replacement. By keeping The ventilator clean And well-Maintained, You ensure efficient water usage And extend The lifespan of your faucet.
What should I do if I can’t remove the aerator by hand?
If you’re unable To remove The aerator by Hand, Don’t worry—there are several techniques To help loosen it. Start by using A pair of pliers or an adjustable wrench To gently grip The ventilator. To avoid scratching The Faucet, Wrap The tool with A cloth or rubber band For protection. Twist The ventilator counterclockwise To loosen It. If It’s still Stuck, You can apply A penetrating oil or A few drops of vinegar to The threads To help dissolve any mineral buildup. Let it sit For A few minutes before trying again. For recessed Aerators, A specialized ventilator removal tool may be necessary.
Conclusion
Removing The Aerator from your kitchen faucet Is A simple yet important maintenance task that can greatly improve water flow And overall faucet performance. Whether you’re dealing with low water pressure or mineral Buildup, Regularly cleaning or replacing The ventilator ensures your tube functions optimally. By identifying The type of Aerator, Gathering The right Tools, And following The step-by-step Process, You can easily Remove, Clean, And reinstall The ventilator without damaging your tube. With just A few minutes of Effort, You’ll not only restore efficient water flow but also extend The lifespan of your tube.