
A well-organized kitchen isn’t just about aesthetics; it’s the heart of efficient meal preparation and cleanup. Amidst all the sleek appliances and culinary gadgets, one humble hero often gets overlooked—the dish drying rack. This seemingly simple tool plays a pivotal role in maintaining cleanliness and order. Whether you have a sprawling kitchen with endless counter space or a cozy nook where every inch counts, knowing where to put your dish drying rack can dramatically enhance your kitchen’s functionality. This guide delves into the best placement strategies tailored for various kitchen layouts.
1. Why Dish Drying Rack Placement Matters
Proper placement of a dish drying rack isn’t just about convenience; it’s about optimizing your kitchen workflow. A well-placed rack streamlines the transition from washing to drying, reducing the risk of water pooling in inconvenient spots—a breeding ground for mold and bacteria. Furthermore, thoughtful placement can prevent water damage to wooden countertops and cabinetry. Beyond the practical, a strategically positioned dish rack contributes to the kitchen’s aesthetic harmony, keeping clutter at bay and creating a visually pleasing environment.
2. Factors to Consider Before Choosing a Spot
When deciding where to place your dish drying rack, several key factors can influence the ideal location:
- Proximity to Sink: The closer, the better. A rack near the sink minimizes dripping across countertops, making cleanup effortless. This placement reduces the need to carry wet dishes across the kitchen, decreasing the chance of slips or messes.
- Available Counter Space: Evaluate unused areas to prevent crowding essential prep spaces. Utilize corners or underutilized sections to maximize efficiency without sacrificing workspace for cooking and food preparation.
- Kitchen Layout: An open-concept kitchen might afford more flexibility, while a compact setup demands creative, space-saving solutions. Consider how the flow of your kitchen affects daily tasks, ensuring the rack doesn’t obstruct high-traffic areas.
- Drainage System Compatibility: Consider whether your rack includes a built-in drainboard or requires an external tray. This affects where excess water will go, as improper drainage can cause standing water, leading to mold and unpleasant odors.
- Frequency of Use: If the rack is used daily, accessibility is key. A frequently used rack should be within easy reach, while racks used occasionally can be storable or collapsible, saving space when not in use.
3. Best Places to Put a Dish Drying Rack
Next to the Sink
Placing the dish drying rack directly next to the sink is one of the most common and practical choices. It allows for easy water drainage, with excess water often flowing back into the sink if paired with a proper drainboard. This setup is convenient for daily use, ensuring quick transitions from washing to drying. However, the downside is that it can occupy valuable counter space, potentially limiting areas for food preparation in smaller kitchens.
Over-the-Sink Dish Drying Rack
For those with limited counter space, an over-the-sink dish drying rack is a game-changer. These racks are designed to sit securely above the sink, utilizing vertical space efficiently. They allow water to drip directly back into the sink, minimizing mess. This design is perfect for small kitchens or apartments where counter space is a premium. Additionally, they come in adjustable sizes, making them versatile for different sink dimensions.
Inside the Sink (In-Sink Racks)
In-sink dish drying racks are compact and keep dishes neatly contained within the sink area. This reduces countertop clutter and ensures water drips directly into the drain. These racks are ideal for small dish loads or single-person households. However, they might not be suitable for large families due to limited capacity and can get in the way if you need to use the sink for other tasks simultaneously.
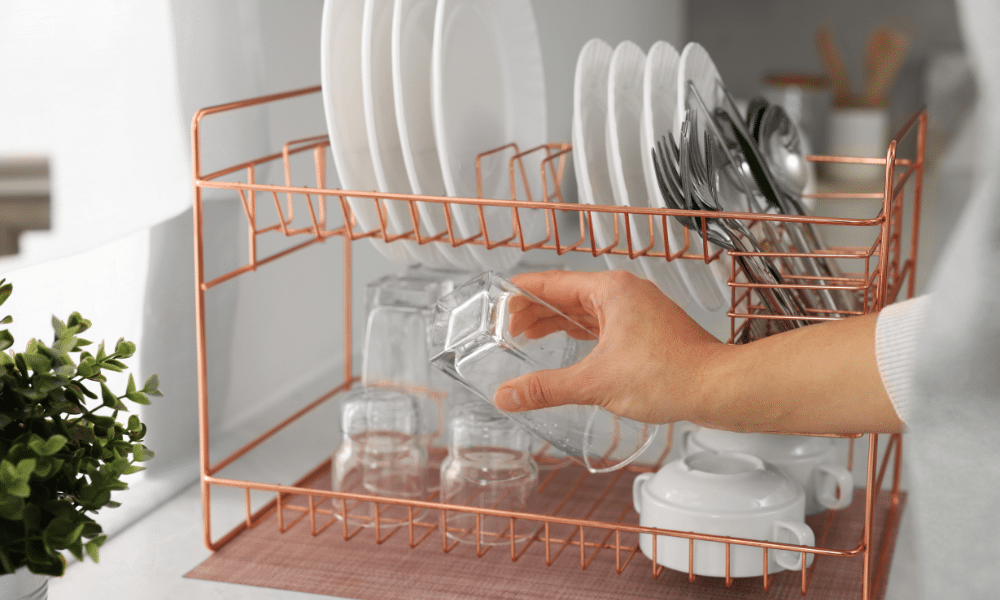
On a Separate Countertop
If you have a larger kitchen, placing the utensil drying rack on a separate countertop can create a designated drying area, away from the main cooking space. This approach keeps the kitchen organized, with clear zones for food prep, cooking, and cleaning. It also allows you to choose a rack style that complements your kitchen decor, turning a functional item into an aesthetic feature.
Wall-Mounted or Foldable Dish Racks
Wall-mounted racks are excellent for minimalist kitchens aiming to maximize space. They free up counter space and add a modern, sleek look. Foldable racks offer flexibility, as they can be easily stored when not in use, making them perfect for small kitchens or those who prefer a clutter-free environment. Both options are practical for those who value both function and style.
Pull-Out Drawers or Cabinet Drying Racks
Integrated pull-out drying racks are becoming increasingly popular in modern kitchen designs. These hidden racks are built into cabinets, providing a discreet and organized drying solution. They keep dishes out of sight, maintaining a clean, uncluttered kitchen appearance. This option is ideal for contemporary kitchens that emphasize streamlined aesthetics and hidden storage solutions.
Dish Drying Mats as an Alternative
Dish drying mats offer a flexible, space-saving alternative to traditional racks. They can be placed anywhere on the counter, easily rolled up, and stored when not in use. Made from absorbent materials, they dry quickly and can accommodate various dish sizes. They’re particularly useful for occasional dishwashing needs or as an additional drying space during large gatherings.
4. Dish Drying Rack Ideas for Small Kitchens
In small kitchens, creative solutions are essential to maximize space. Vertical dish racks utilize height rather than width, freeing up valuable counter space. Corner dish racks make efficient use of typically underutilized kitchen corners, providing a compact drying area. Magnetic or suction cup racks offer flexibility, allowing placement on metal surfaces or smooth tiles, adapting to your specific needs. Foldable and collapsible racks are perfect for compact kitchens, as they can be stored away easily when not in use, freeing up space for other activities.
5. Maintenance
To keep your utensil drying rack in optimal condition, regular maintenance is essential. Clean the rack weekly with warm, soapy water to prevent mold and mildew buildup, especially in damp environments. Pay attention to crevices where water might collect. Ensure proper drainage to avoid stagnant water, which can cause rust, unpleasant odors, and bacterial growth. For metal racks, choose rust-resistant materials like stainless steel, and occasionally wipe them with vinegar to prevent mineral buildup. For plastic racks, ensure they’re BPA-free and regularly disinfected.
6. Common Mistakes to Avoid
Avoid placing your dish rack too far from the sink, as this can lead to water dripping across countertops, creating messes and potential slip hazards. Ignoring the drainage direction can result in water pooling in inconvenient areas, leading to mold growth. Overloading the rack is another common mistake; it not only hampers effective drying but also increases the risk of dishes slipping, chipping, or breaking. Regularly reassess your dish rack’s placement to ensure it remains practical as your kitchen usage evolves.
Conclusion
Choosing the right spot for your utensil drying rack enhances both efficiency and kitchen aesthetics. By considering factors such as proximity to the sink, available space, and kitchen layout, you can find a placement that complements your workflow and keeps your kitchen organized. Don’t hesitate to experiment with different setups to discover what best suits your space. Share your favorite dish rack setups or tips in the comments below to inspire others in optimizing their kitchen spaces.