
Replacing a kitchen faucet can seem Daunting, But it’s a manageable DIY project that can save you time And money. A single-handle faucet is A popular choice for its sleek look and ease of use, but over time, Even the best tube can wear out or start leaking. Whether you’re updating your kitchen’s style Or simply fixing a faulty faucet, Knowing how to replace A single-handle kitchen faucet is A valuable skill. In this guide, We’ll walk you through the process step-By-step, from gathering the necessary tools To securely installing your new faucet. By the end, you’ll have the confidence To tackle this project on your own, With a brand-new tube that works perfectly and adds a fresh look to your kitchen. Let’s get started And make replacing your kitchen tube a simple, Straightforward task!
Tools and Materials Needed
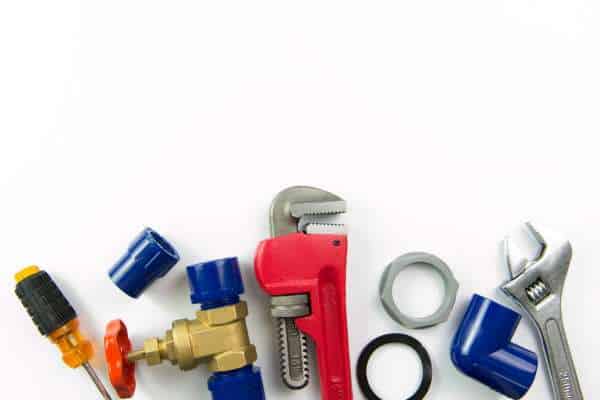
Before you begin replacing your kitchen faucet, It’s essential to have the right tools and materials on hand To make the process smooth And efficient. You’ll need an adjustable wrench and A basin wrench, both of which Are key for loosening And tightening nuts in hard-to-reach spaces under the sink. A screwdriver, Typically a Phillips or flathead, Will be useful for securing fittings, Depending on your faucet’s design. It’s also a good idea to have A bucket or a small container nearby To catch any residual water that may spill when you disconnect The old faucet. Plumber’s tape is essential for creating A watertight seal on your connections, Helping to prevent leaks once everything is installed. If your new tube comes with a gasket, keep it handy, As it will help create a secure base. With these tools And materials Ready, You’ll be fully prepared to take on this project!
Turn Off the Water Supply
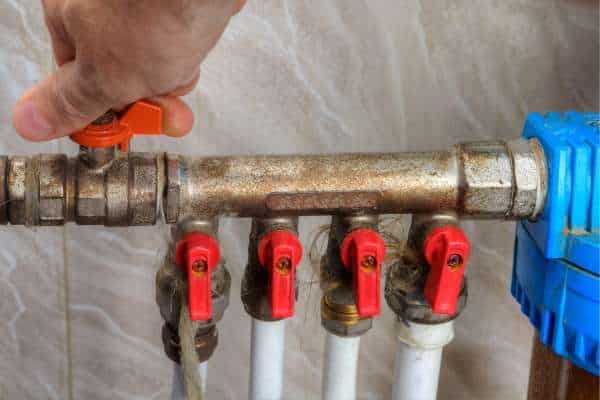
Turning off the water supply is the first And most important step when replacing A kitchen faucet. Begin by locating the shut-off valves under your sink—one for hot water And one for cold. Turn each valve clockwise to fully close Them, which will stop The flow of water to your faucet. To make sure the water is completely off, Turn on the tube and check that no water comes out. If you don’t have individual shut-off valves under the sink, You’ll need to turn off your home’s main water supply. Once the water is off, Place a bucket or towel underneath the pipes To catch any residual water that might spill out when You disconnect the lines. This ensures a cleaner And smoother process as you move on To the next steps.
Disconnect Water Lines
After turning off the water supply, The next step is to disconnect the water lines from your old faucet. You’ll find two flexible hoses—one for hot water And one for cold—connected to the bottom of the tube And the shut-off valves. Using an adjustable wrench, Carefully loosen the nuts connecting each water line to the tube. Be prepared for A small amount of residual water to drain out, So keep a towel or bucket under the area to catch any drips. If the connections are tight, A basin wrench can make it easier To reach and turn the nuts. Once both lines are detached, Set them aside and wipe down any water left on The valves or surrounding area. With the water lines Disconnected, you’re ready to remove The old faucet and move on to installation.
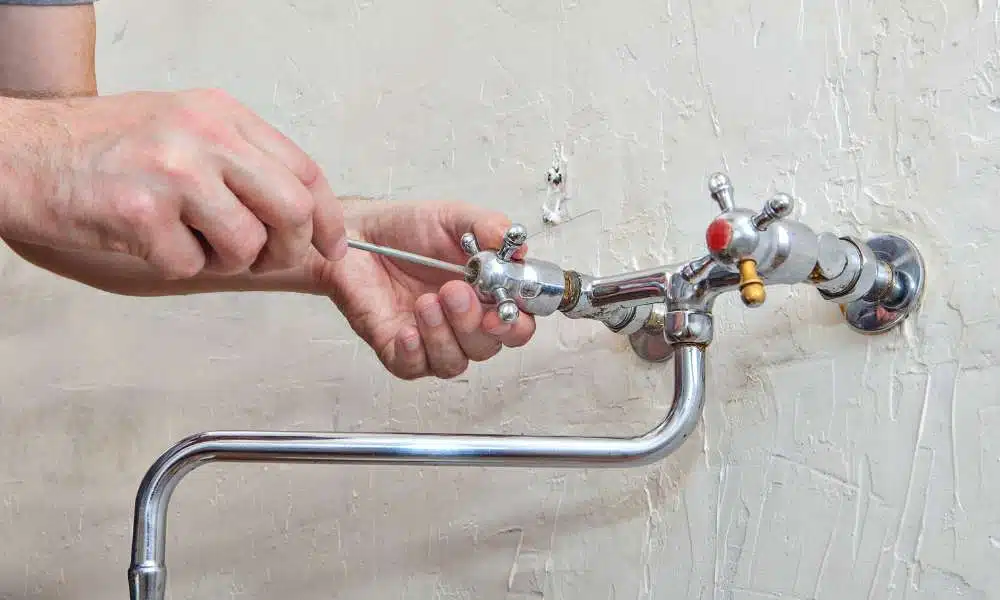
Remove the Old Faucet
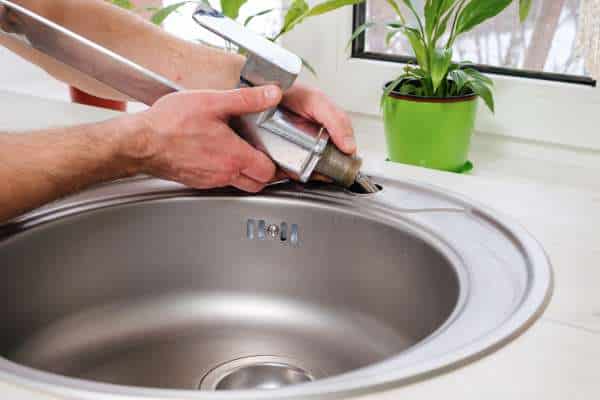
With the water lines disconnected, It’s time to remove the old faucet. Start by locating The mounting nuts that secure the tube to The sink from underneath. These nuts are typically found directly beneath The tube handles or base and may require A basin wrench to reach, Especially in tight spaces. Carefully loosen and remove these nuts, Then set them aside. Once the nuts are off, Lift the old tube straight up from the sink. If the faucet is stuck, gently wiggle It back and forth To loosen any old plumber’s putty Or grime that may be holding it in place. Take a moment To clean the area around the tube holes with A damp cloth, removing any buildup or debris. This ensures a clean, Smooth surface for installing your new tube.
Clean the Mounting Area
After removing the old faucet, It’s essential to clean the mounting area to ensure a secure installation for tThe new one. Start by wiping away Any old plumber’s putty, grime, Or mineral deposits around the tube holes using a damp cloth or sponge. If there’s stubborn residue, A mild soap or vinegar solution can help dissolve buildup effectively. For tougher areas, A plastic scraper works well without damaging the sink surface. Make sure To clean thoroughly around And inside the holes where the tube will sit, As any leftover residue can prevent A proper seal. Dry the area with A clean towel, Ensuring it’s fully prepared for the new faucet. A smooth, Clean surface will make it easier to install the tube securely And prevent potential leaks down the line.
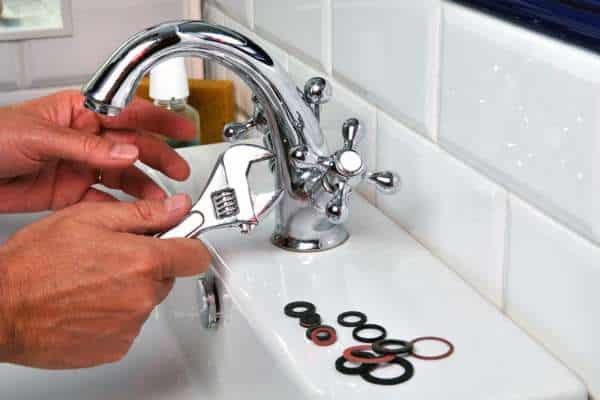
Install the New Gasket or Seal
With the mounting area clean, It’s time to install the new kitchen faucet gasket or seal for your . Most single-handle faucets come with A rubber or plastic gasket that sits between the tube base And the sink, creating a watertight seal. Start by placing the gasket over the mounting holes, Aligning it carefully. If youtube doesn’t include a gasket, Apply a thin bead Of plumber’s putty around the base of the tube to create A seal. Gently press the tube onto the gasket Or putty, Ensuring it sits securely and evenly. This seal is crucial for preventing water from leaking under The tube And into The cabinet below. Once in place, check that the faucet is aligned correctly with The sink. With the gasket or putty set, you’re ready to secure The tube from underneath.
Position the New Faucet

Now that the gasket or seal is in place, It’s time to position the new faucet over the mounting holes. Carefully align the faucet so that the base sits securely on top of the gasket, Ensuring that the hot and cold water connections match up with The appropriate supply lines. Double-check The alignment by looking at the tube from different angles To make sure it’s straight And centered. If your tube has an integrated sprayer or other components, Guide those through the mounting holes as well. Once positioned, Hold the tube steady while checking that everything Is sitting flush with the sink. A well-aligned tube not only looks better but also helps To prevent any potential leaks around the base. With The tube securely in place, you’re ready to move on To securing it from underneath the sink.
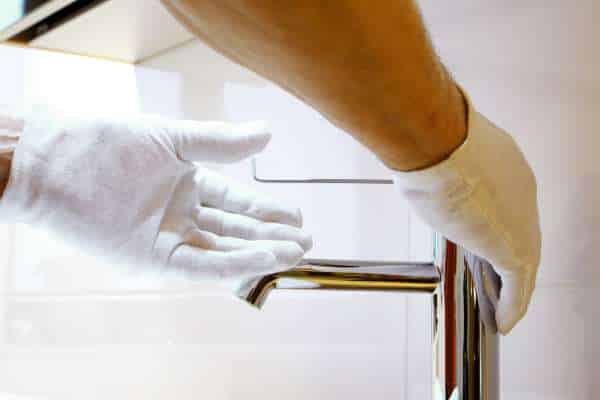
Secure the Faucet Underneath
With the faucet positioned correctly on the sink,The next step is to secure it from underneath. Locate the mounting nuts that came with your faucet, And slide them onto the faucet’s threaded shanks under the sink. Tighten these nuts by hand initially to ensure the tube stays in place, Then use a basin wrench to further tighten them for A secure fit. Be careful not to overtighten, As this could damage the sink or the tube components. As you tighten, Occasionally check the tube from above To ensure it remains aligned and centered on the sink. A stable,Well-secured tube is key to preventing leaks And wobbling over time. Once the nuts are tightened and the tube is firmly in place, You’re ready to connect the water supply lines And complete the installation.
Connect Water Supply Lines to the New Faucet
With the faucet securely mounted, It’s time To connect the water supply lines. Begin by attaching the hot And cold water lines to The corresponding inlets on The new tube. Typically, the hot water line connects on the left, And the cold on the right. Hand-tighten each connection first, Then use an adjustable wrench To secure them further. Be careful not to overtighten, As this can damage the fittings or lead to leaks. Apply A small amount of plumber’s tape to The threads if recommended, which helps ensure A watertight seal. After connecting both lines, double-check all connections to make sure they’re snug And secure. Once everything is in place, you’re ready to turn on the water supply and test your new tube for leaks and proper functionality, Completing the installation process.
Turn On Water Supply and Check for Leaks
With the water supply lines connected, The final step is to turn on the water and check for leaks. Begin by slowly opening the hot And cold water shut-off valves under the sink, Allowing water to flow back into the tube. As you do this, carefully inspect each connection point under The sink for any signs of dripping or moisture. If you notice a Leak, gently tighten The connection with an adjustable wrench until it stops. Once you’re confident there are no leaks, Turn on the faucet and let the water run for A few minutes to ensure it operates smoothly. Check again under the sink as the tube runs, Confirming that everything remains dry. This thorough check will ensure a successful installation And give you peace Of mind that your new faucet Is securely in place and leak-free.
How long does it typically take to replace a single-handle kitchen faucet?
Replacing a single-handle kitchen faucet is A relatively straightforward DIY project, and for most people, It takes about one to two hours. The exact time can vary depending on your experience level And the condition of your current tube. If it’s older and has corroded fittings, You may spend extra time loosening parts or cleaning The mounting area. Having the right tools—like an adjustable wrench, Basin wrench, and plumber’s tape—On hand can make the process faster And more efficient. Additionally, if you’re familiar with disconnecting water lines And securing new fittings, you may be able To complete the job more quickly. For beginners, taking it step-by-step And carefully following instructions will help ensure a smooth process, Allowing you to replace your tube with confidence in A reasonable amount of time.
Do I need to hire a plumber to replace my kitchen faucet?
Hiring a plumber to replace your kitchen faucet isn’t always necessary, As it’s a manageable DIY project for most homeowners. With basic tools like an adjustable wrench, Basin wrench, and plumber’s tape, you can complete The job yourself in about one To two hours. Replacing a single-handle kitchen tube involves straightforward steps, Such as turning off the water supply, disconnecting the old faucet, And securing the new one in place. However, if you encounter issues like rusted or hard-to-remove fittings, Outdated plumbing, Or leaks that persist even after installation, you may want To consider professional help. A plumber has the expertise to quickly address these complications. So, while most people can successfully replace A kitchen tube on their own, hiring a plumber is always an option for A seamless And stress-free experience.
Conclusion
Replacing a single-handle kitchen faucet doesn’t have To be intimidating. By following these simple steps, You can successfully remove The old tube, install a new one, And ensure everything is properly connected and leak-free. Taking on this project yourself can not only save you The cost of hiring a plumber but also give you a sense Of accomplishment In maintaining your home. Remember to turn off the water supply before you start, And double-check all connections before you test The new faucet. If you encounter any issues along The way—such as rusted fittings Or challenging connections—don’t hesitate To consult a professional. With the right tools, a bit of patience, And attention to detail, You’ll have a brand-new tube in no time. Enjoy the improved functionality And style in your kitchen, And know that you’ve tackled A useful DIY upgrade!